How to install lawn edging: metal & plastic garden border edges guide
Lee Burkhill: Award Winning Designer & BBC 1's Garden Rescue Presenters Official Blog
Intermediate level
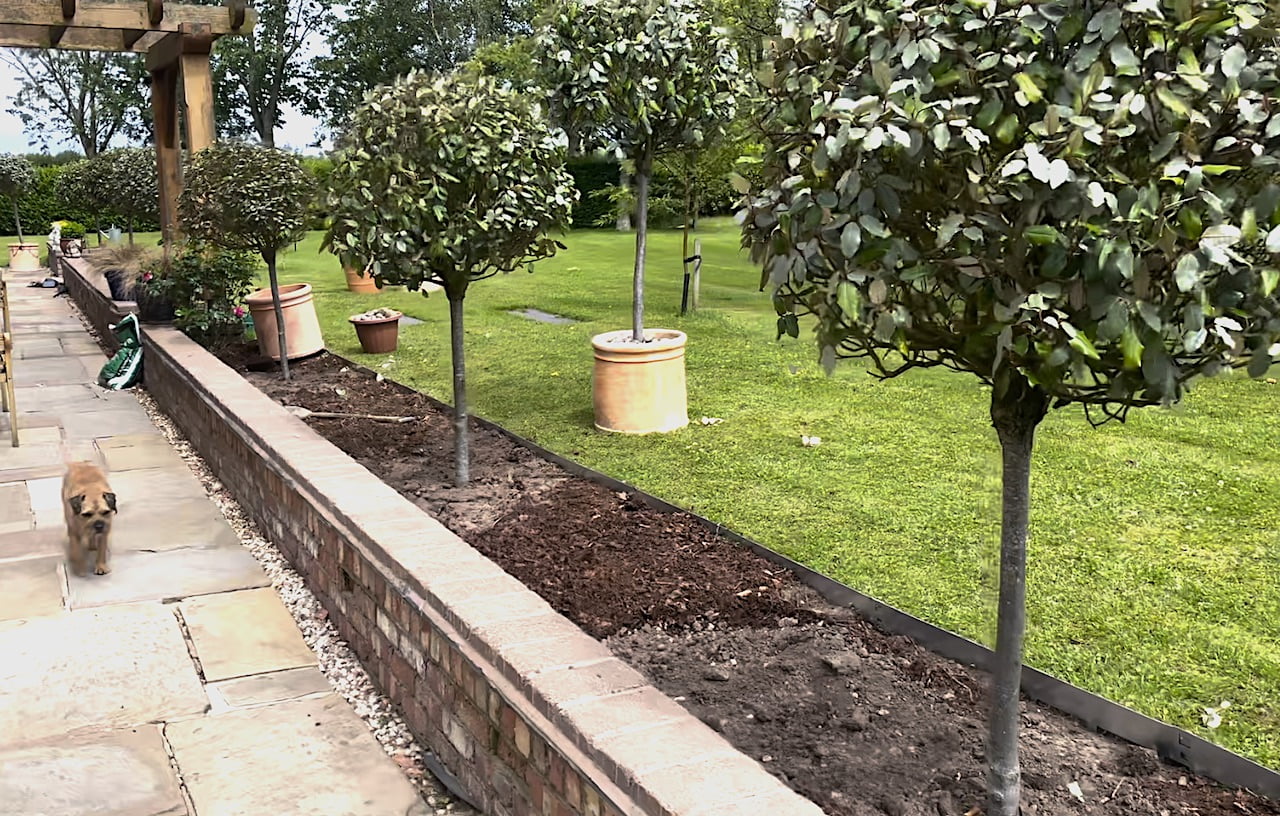
Lawn edging is one of the easiest ways to reduce garden maintenance Without it, you're left having to edge the lawn every month or so as the grass encroaches into your flower beds. By fitting lawn edging, you can save yourself all this lawn maintenance hassel.
Lawn edging and flower border edge stips are a really effective way of keeping your garden flower beds and lawn looking sharp all year round. In fact, it's one of my garden design secret weapons! I use lawn and border edging in most of my designs to help reduce garden maintenance and increase the amount of time you get simply enjoying your garden!
These clean edges stop grass growing into your flower beds and completely eliminate the need to use the half moon edger saving huge amounts of time when maintaining your lawn or flower beds.
Lawn edging is a strip of metal, plastic or other weatherproof material such as bricks, that is used to provide a barrier between your lawn and any flower beds.
It helps define the edge and reduce the amount of time spent with a half-moon edger cutting clean turn lines each year. This is because the lawn edging prevents grass from growing into your flower beds which in turn reduces weeding or grass removal!
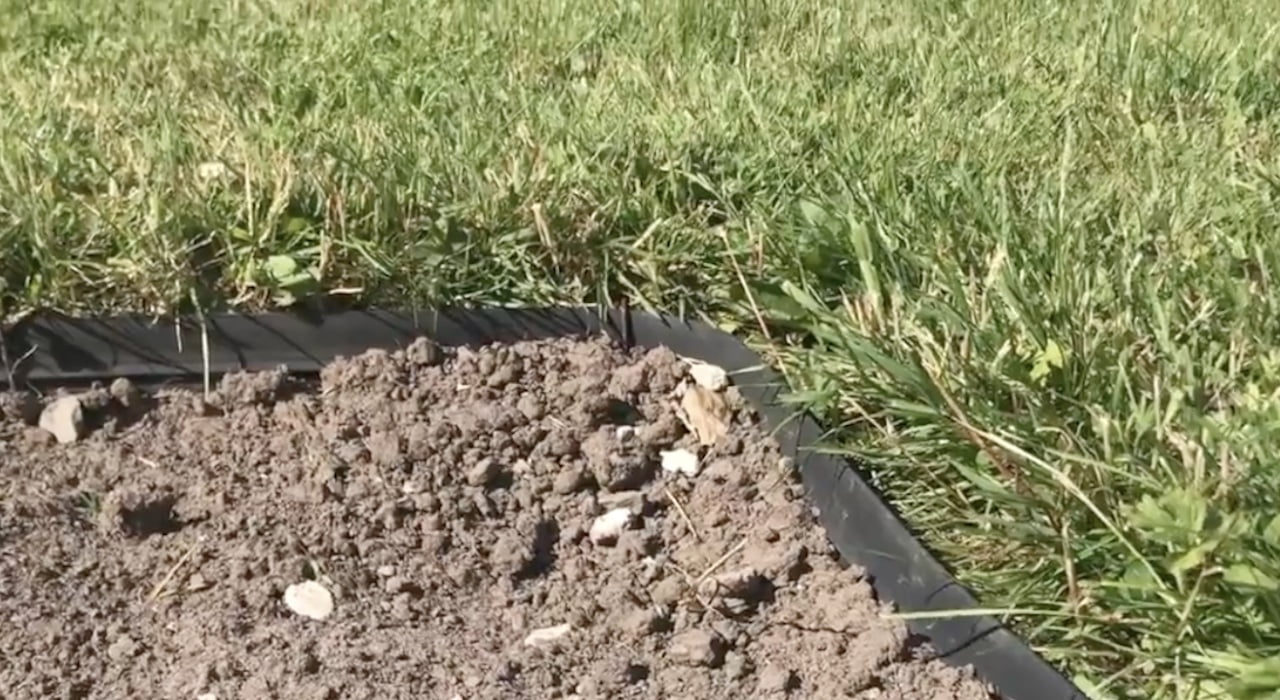
Ideally, lawn edging is low enough to be mowed over but high enough to stop grass from growing over it. This is why most lawn edging sticks up 3mm above the soil level. Given most lawns are mowed with a few centimetres clearance the strip doesn't catch on the mower.
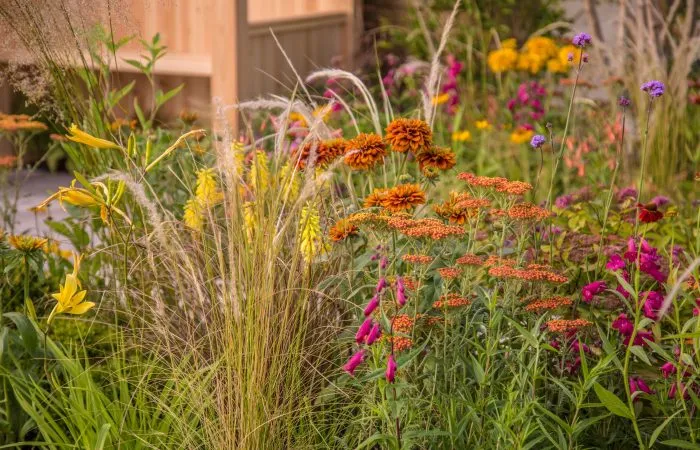
Lawn edging can also be used as a design aesthetic to provide a striking contrast between the lawn and the flower bed. In particular, corTen steel (which turns bright orange in the rain) or coloured edging strips can really offset against the bright green lawn.
Lawn edges such as metal or plastic edging strips prevent the need to manually 'edge' your flower beds and lawns with a half-moon edger. Without this strip twice a year, you'll be cutting the entire edge of your lawn with edging shears or a half-moon edger. It's boring, thankless, and a waste of time in your gardening year!
What's the best way to keep a clean lawn edge?
The best option for clean lawn edges is to use edging strips that sink into the soil. They provide a barrier from grass and weeds growing into your flower beds and help keep your lawn's shape crisp all year round, even in winter!
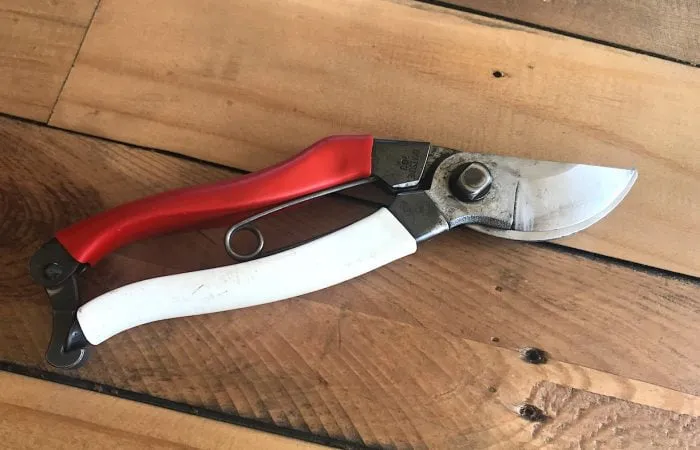
Tools needed to fit lawn edging
Fitting lawn or flower bed edging is super simple. Any gardener no matter what your experience can fit it without the need for a contractor or specialist. All you need is a bit of time and a dry sunny day in your garden with the correct tools.
The following tools are required for this easy garden task when fitting lawn edging:
Fitting lawn edging is relatively easy and doesn't require a degree in DIY or landscaping. The process is the same for both metal and plastic edging.
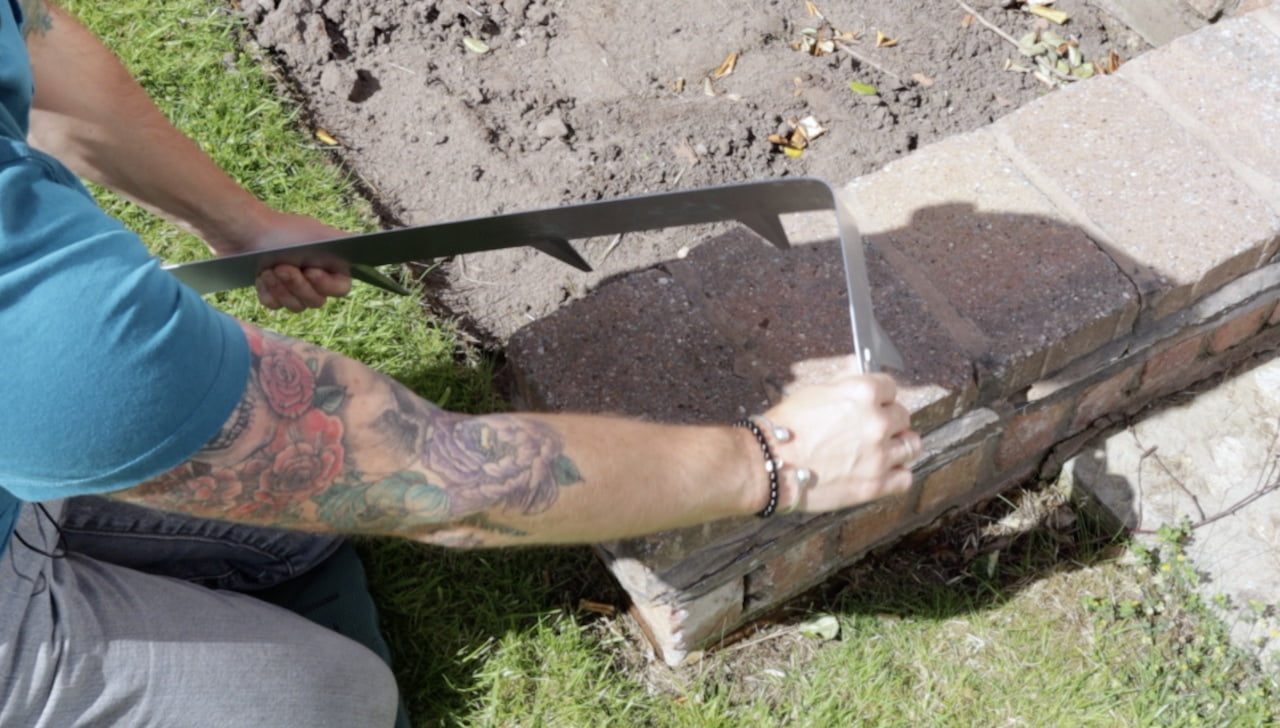
Step 1: Cut a neat edge between the flower bed and lawn
This helps define the space and gives you a clean line to start with. Use a sharp spade or half-moon edger to create your newly defined lawn.
Any turf that's dug up can be easily composted by turning it upside down and leaving it for 6 -9 months. Usually, the back of a shed or border is an ideal place to do this. This allows the turf to rot down leaving beautiful loamy soil.
Step 2: Work out how much edging you need
Using a tape measure work out how many meters of edging you need. Remember that corners look better if made from one continuous piece that has a join on a bend or corner.
Lay out your edging.
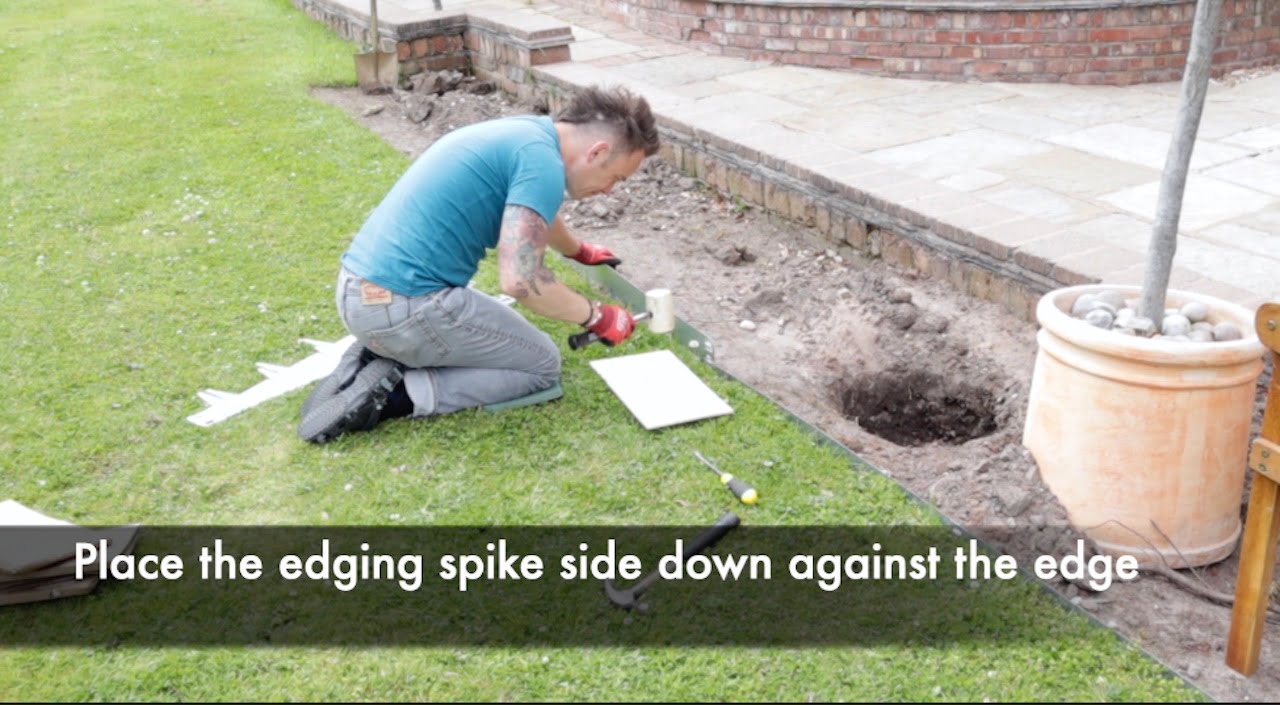
Step 3: Push the metal spikes into position
You want to position the edging right up against the turf with the spikes facing downwards. These will be the anchors for the strip to stabilise it in the soil.
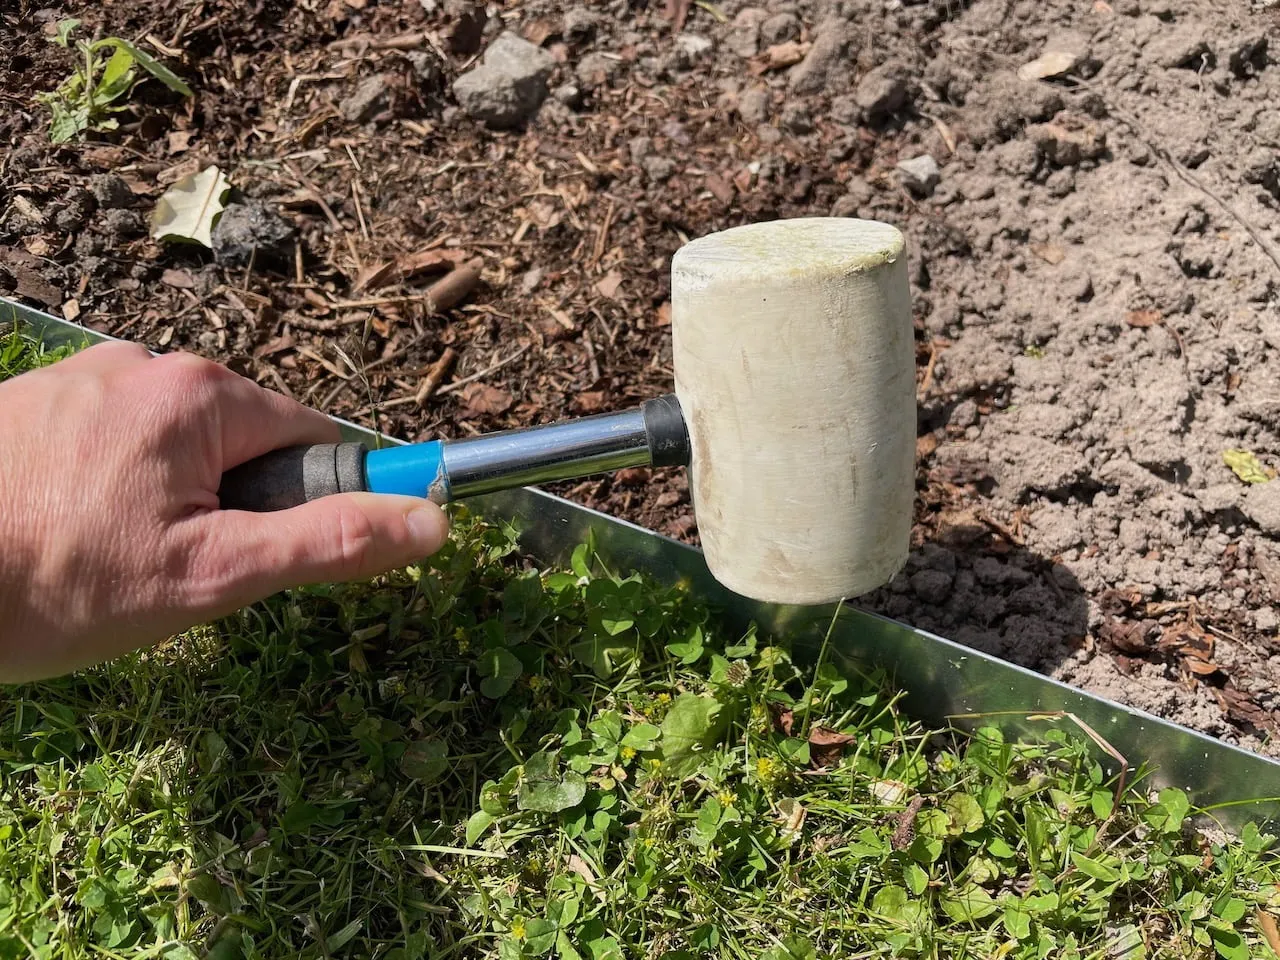
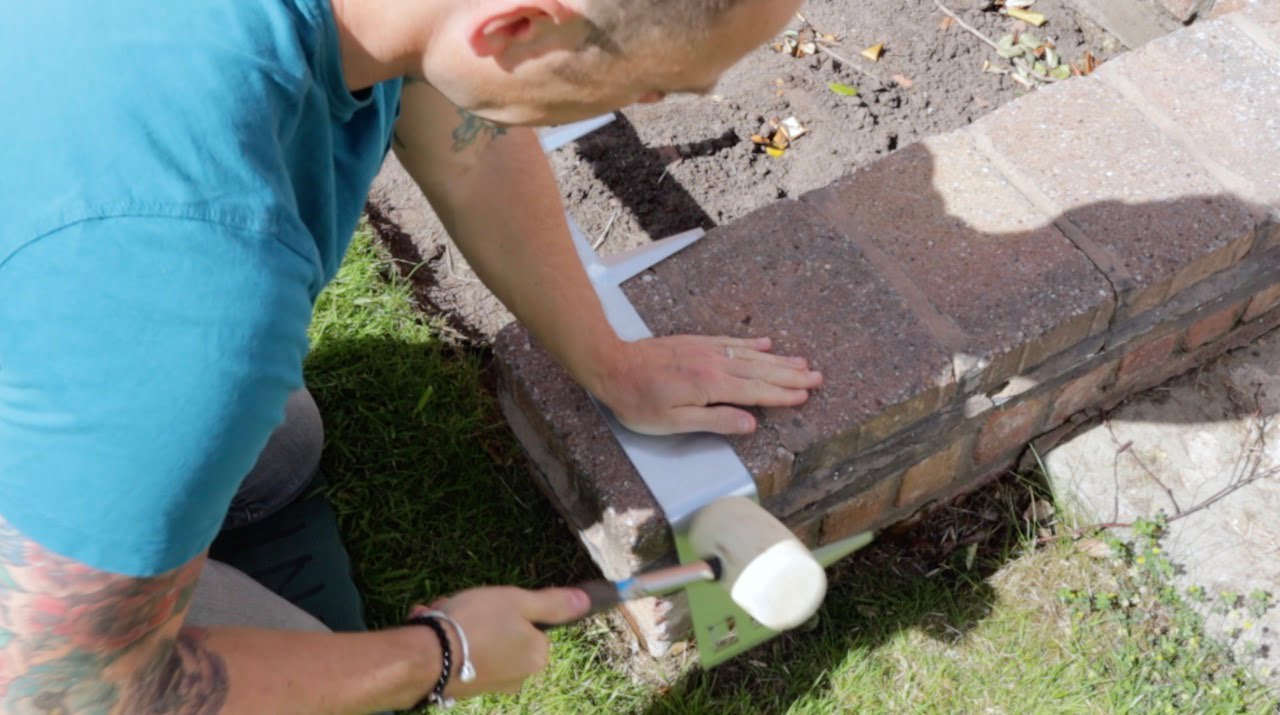
Step 4: Use a mallet to evenly embed the strip into the ground
You want to embed the lawn strip so 3mm is above the soil level of the turf. This allows for easy mowing. You can use the wooden block to even out the pressure from the mallet and stop the metal from being damaged.
Hammer in the lawn edges in a uniform fashion. You may need to work from one side to the other in a repetitive fashion until it's level.
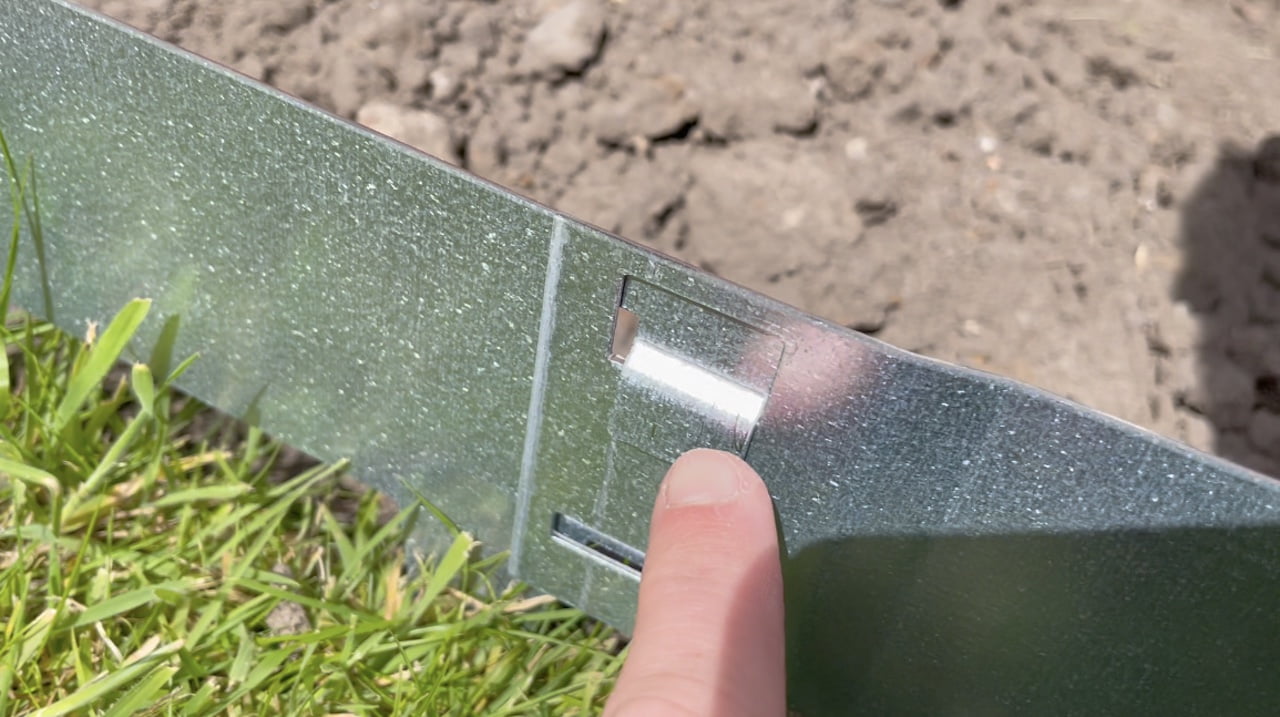
Step 5: Connect the strip using the connector or pins
Most metal edges come with a connector that overlaps slightly on one side, usually the right side. Connect these together to ensure the line is unified and doesn't bend or flex apart from each other. The screwdriver can help manipulate the connector to fit snugly!
You may need to use the mallet again after this to ensure its level again.
Step 6: Dealing with corners
With metal edging it's easy to bend the lawn strip to accommodate corners or even right-angled bends.
Work out where the corner needs to start and then use a strong flat edge such as a wall, block or piece of wood you can then bend the edge round by hand. Finish it off by using the mallet to create a flush neat bend. Then fit as you would a regular strip.
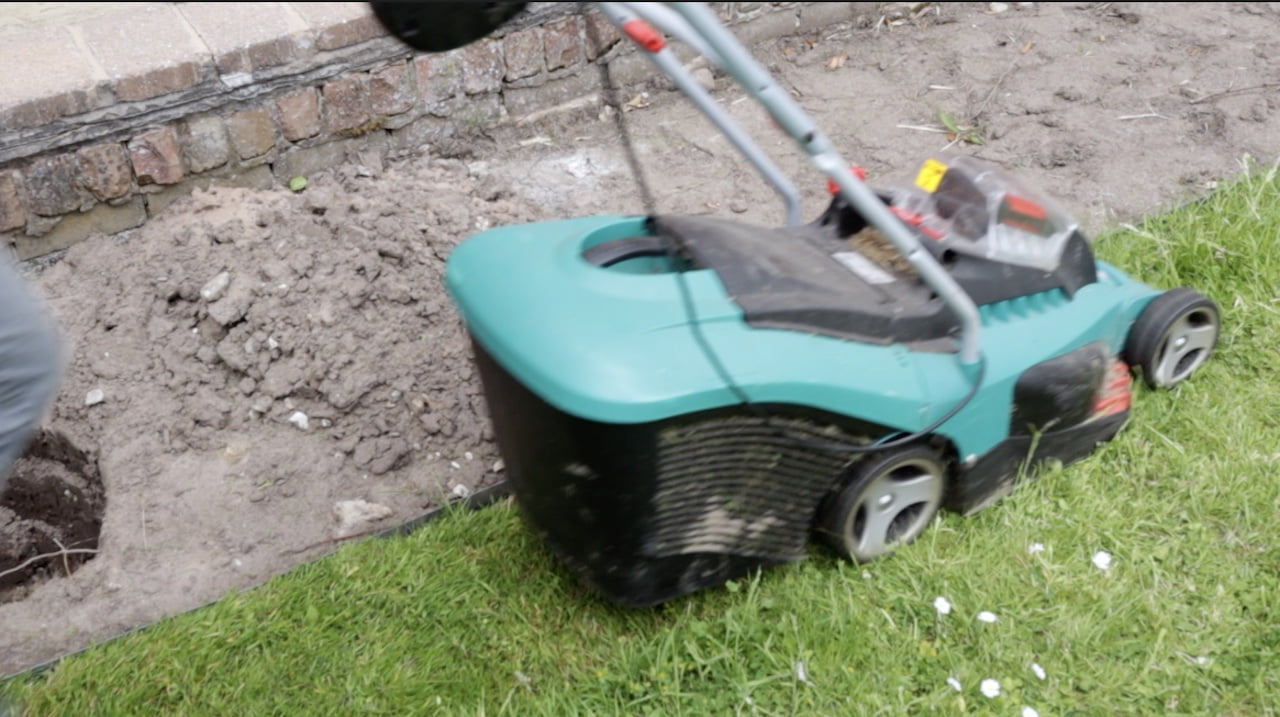
Step 7: Check it's low enough for the mower to pass over
If your edging is 1-3mm above the soil level your mower on setting 3 (the lowest of most mowers without scalping a lawn) will pass over easily for perfect edges!
How to fit plastic lawn edging
Fitting plastic lawn edging is the same as above, apart from the fact that usually, they don't come with spikes. Plastic garden edging usually has to be dug into a mini trench or slit. So can be more time-consuming.
Step 1: Dig a trench that's at least 10cm deep for the edging
Use a sharp spade and dig your trench along the side of the newly neatened lawn.
Dig your trench for lawn edging 3–6 in (7.6–15.2 cm) deep depending on soil type (clay soil may be shallower as will bind easier whereas sandy soil will need to be deeper).
Step 2: Backfill the trench to secure the strip
Using your heel backfill the flower bedside of the strip so it's secure. Ensuring the strip is straight and not at a lean where it can catch your mowers blades.
Step 3: Use pins, tent pegs or grips to join together.
Plastic lawn edging also uses pins to give it a firm grip and allow you to connect multiple pieces together in one run. It's always best to try and get the longest run out of one piece rather than joining pieces together. It looks better and is easier to manage.
Which is the best metal or plastic lawn edging?
In my work, I've used both metal and plastic. If money is no object then metal garden edging wins hands down in terms of ease of installation and also life span. It tends to fail less whereas plastic strips can sometimes pop up if not secured properly.
There are other materials you can use to edge lawns and flower beds such as bricks, concrete, logs or even willow rolls, lets look at the cost differences.
The "best and easiest" material depends a bit on what you're aiming for—whether it's low maintenance, a natural look, affordability, or ease of installation. Here's a breakdown of the top options, ranked by ease and effectiveness for beginners:
i) Plastic or Rubber Edging
Best for: Budget-conscious gardeners who want something quick, flexible, and easy.
Pros:
Super easy to install—just dig a shallow trench and press it in.
Flexible for curves and wavy borders.
Often made from recycled materials (eco-friendly versions available).
Affordable and widely available in garden centres and DIY shops.
Cons:
Doesn’t look super "high-end."
Can lift or warp over time if not installed deep enough.
Ninja Tip: Choose a heavy-duty recycled rubber version for better durability and environmental benefits.
ii) Timber Edging (e.g., Treated Sleepers or Logs)
Best for: Rustic or cottage-style gardens.
Pros:
Natural look that blends with planting schemes.
Easy to source and install (lay in place, peg in if needed).
Cons:
It will rot over time unless properly treated.
Heavier and less flexible than plastic.
Ninja Tip: Raise timber slightly on gravel or stones to prevent direct contact with wet soil—this extends its life.
iii) Metal Edging (Steel or Aluminium)
Best for: Sleek, modern gardens or clean geometric designs.
Pros:
Long-lasting and durable—steel versions can last decades.
Flexible enough for curves, but stays rigid once installed.
Dry-lay bricks for a simple mowing edge without needing mortar—easier for beginners.
Material
Cost
Ease of Install
Durability
Style
Plastic/Rubber
£
⭐⭐⭐⭐⭐
⭐⭐
Casual
Timber
££
⭐⭐⭐⭐
⭐⭐⭐
Rustic
Metal
£££
⭐⭐⭐
⭐⭐⭐⭐
Modern
Brick/Stone
££££
⭐⭐
⭐⭐⭐⭐
Traditional
Cost Differences Between Lawn Edging
Material
Cost per Metre (£)
Pre-formed Concrete
20 - 30
Timber (Wood)
5 - 8
Brick (End-to-End)
25 - 35
Brick (Side-by-Side)
65 - 85
Metal
50 - 100
Plastic
7 - 15
Bamboo
9 - 12
Willow
7 - 9
Log Roll
6 - 15
EverEdge Classic (7.5 cm height)
7 - 10
EverEdge Classic (10 cm height)
9 - 12
EverEdge Classic (12.5 cm height)
10 - 14
What's the price difference between metal and plastic lawn edging?
The cost is a consideration when you consider metal edging can be £8-10 per meter vs plastic which is around £2 per meter. In larger gardens, this can soon add up making it a costly considered choice.
However, steel looks far neater and is more robust than plastic lawn edging in my professional opinion!
What is Everedge lawn edging?
Everedge is a proprietary form of metal edging from the UK. Everedge is one of the best and well-recognised brands as it is super easy to fit, available in a range of colours and has a great life span. The edging used in my guide was Everedge, but they did not endorse or sponsor it.
Learn more about Garden Design
Why not consider expanding your growing and garden design knowledge with one of my online gardening courses? My Garden Design for Beginners Course is here to help you transform your garden with an affordable online course, no matter how little your experience with plants.
This course offers step-by-step guidance from me, Lee Burkhill, the Garden Ninja—award-winning garden designer and presenter on BBC1’s Garden Rescue. In this course, you’ll go from a garden design novice to a confident designer equipped to tackle any green space.
Planting Techniques – Select and arrange plants like a pro.
Design Styles & Layout Options – Explore different styles to suit every garden.
Course Features:
20 Hours of Study Time
Flexible Online Learning
Engaging Video Lessons & Quizzes
Real-World Case Studies
Certification upon Completion
Taught by Award-Winning Designer Lee Burkhill
Enrol now for just £199 and start your journey toward garden design mastery!
£29
Garden Design Examples for Small Gardens: 30 Design Templates & Planting Plans
Garden Design Examples for Small Gardens: 30 Design Templates & Planting Plans: In this online gardening course, I'll walk you through 30 fantastic garden designs, explaining the logic behind the layout, the plant choices, and take-home tips for applying them in your own garden.
Weekend Garden Makeover: A Crash Course in Design for Beginners
Learn how to transform and design your own garden with Lee Burkhills crash course in garden design. Over 5 hours Lee will teach you how to design your own dream garden. Featuring practical design examples, planting ideas and video guides. Learn how to design your garden in one weekend!
Garden Design for Beginners: Create Your Dream Garden in Just 4 Weeks
Garden Design for Beginners Online Course: If you want to make the career jump to becoming a garden designer or to learn how to design your own garden, this is the beginner course for you. Join me, Lee Burkhill, an award-winning garden designer, as I train you in the art of beautiful garden design.
Lawn edging is a great way to reduce maintenance and sharpen up the look of your garden. It means you can spend less time edging and more time enjoying your green space. With a multitude of colours and materials, the choice is yours whether you want to make your lawn edges look like a statement piece or just blend in.
I’d love to hear back from you on your grow-your-own journey! How have your seedlings been getting on? Why not get in touch on Social media? You can Tweet, Facebook or Instagram me. You can also check out the other guides and vlogs on my Youtube channel.


 To my YouTube channel
If your borders are more curved rather than having corners will the metal edging still work ? Can it be bent /shaped to follow a curved edge? Thanks